Introduction
Welcome to the world of numerical instrcution programming, let's enjoy the fun and challanges together!
To start programming with Steamania JoyKit soon, we just need some knowledge in the field of number system or numeral system, whcih is, the system of naming or representing numbers in a scientific way.
With this introduction, as well as the user manual, examples and cases on this website, we will gradually get familiar with the Steamania JoyKit programmer and focus on writing programs, building electronics, mechanics and other functional toys in the scope of engineering.
A computer is helpful, but not a must in Steamania projects. Here begins our first program on the JoyKit hardware and optional electronic modules.
Electronic Modules, Parts and Extensions
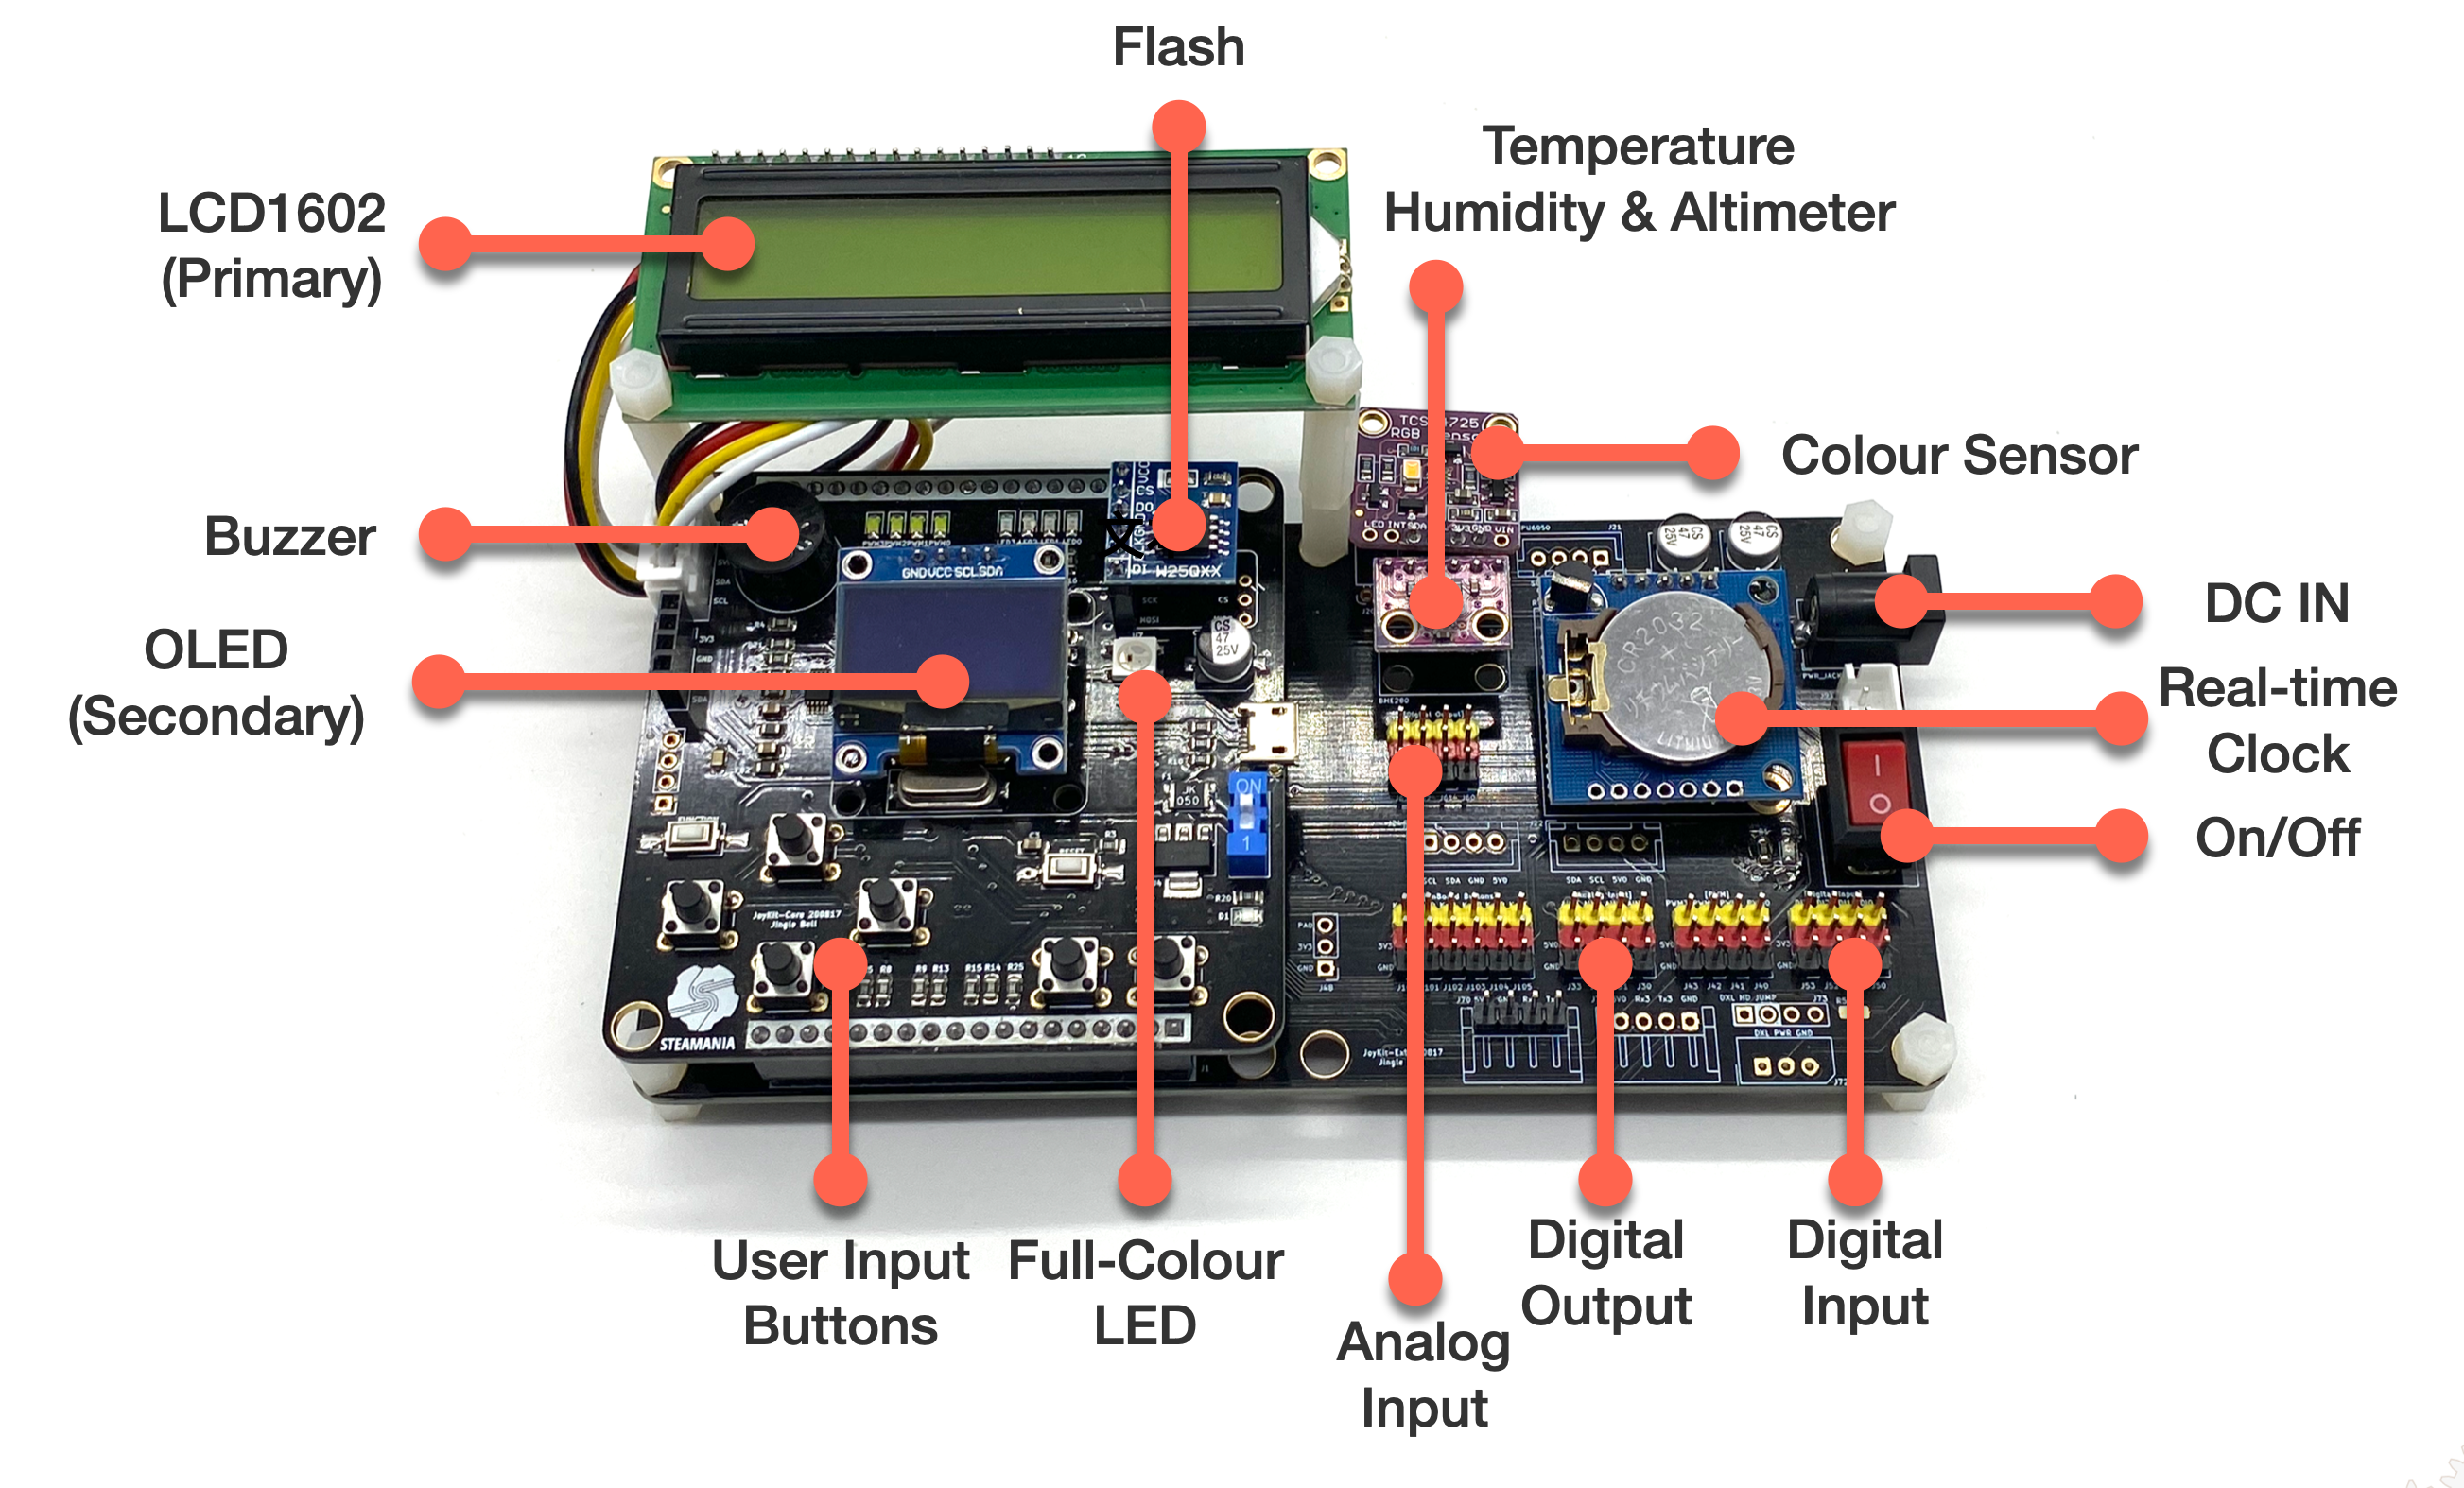
Some on-board electronic components and modules on Steamania JoyKit are demonstrated below.

| Module | Model/Type |
|---|---|
| 16x2 Display | LCD1602 |
| 0.96" OLED 128x64 | SSD1306 |
| RGB LED | RGB Full Colour |
| Bluetooth | JDY-10M-2.3 |
| AD Conversion | ADS1115 |
| Buzzer | 3.3V PWM Driven |
| Buttons | Push Switches |
| Flash | W25QXX Series |
| Temp., Humi. & Alti. | BMP/BME280 |
| RealTime Clock | RTC_DS1307 |
| Colour Detection | TCS34725 |
Beside the above listed, various I/O connectors are included on the board.
info
LCD1602 16x2 characters liqiud crystal display is the primary display interface for code edit and exection/debugging.
info
0.96" OLED 128x64 pixels display is a secondary display used for showing system status and graphics, such as current values in each register, network information, foreground and background images.